Excel VBA XLUP
דבר אחד שעליך לזכור בעת כתיבת קוד VBA הוא מה שאתה עושה עם גליון העבודה הרגיל ותוכל לשכפל את אותו הדבר גם ב- VBA. מילת מפתח אחת כזו בקידוד VBA היא "XLUP", במאמר זה נראה לכם מהי מילת מפתח זו בקידוד VBA וכיצד להשתמש בה בקידוד.
כיצד להשתמש ב- VBA XLUP בקידוד?
להלן דוגמאות ל- excel VBA XLUP.
ניתן להוריד תבנית VBA XLUP זו כאן - תבנית VBA XLUP Excelדוגמה מס '1 - העבר תאים למיקום תאים שנמחק
לדוגמה, בדוק את התרחיש של הנתונים שלמטה, שם עליך למחוק את נתוני התאים הצבעוניים ועוד מעלה את נתוני השורות שלמטה לנתונים שלעיל.
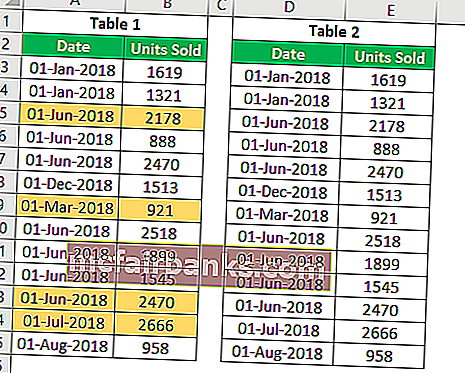
אחת הדרכים למחוק זאת בגליון העבודה היא לבחור את התאים שבהם אנו יכולים פשוט למחוק את כל השורה עצמה. אבל כאן מצבים מעט מסובכים מכיוון שיש לי תאים צבעוניים בטבלה 1 כאשר אנו מוחקים את השורה כולה, אפילו שורות טבלה 2 גם נמחקות, אך איננו רוצים שזה יקרה במקום זאת עלינו למחוק רק שורות צבעוניות ותאים מתחת צריכים לזוז מעלה את מיקום התאים שנמחקו.
ראשית, בחר בתאים הצבעוניים ולחץ על Ctrl + סמל מינוס (-) כדי לפתוח את האפשרות "מחק".
מקש קיצור לפתיחת אפשרות "מחק"

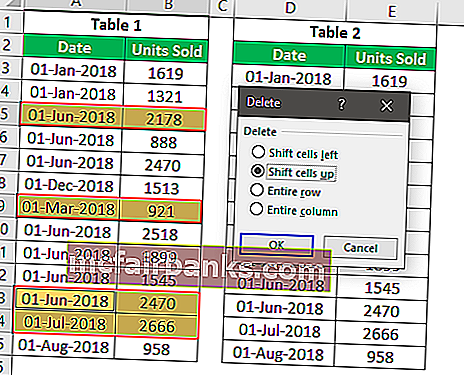
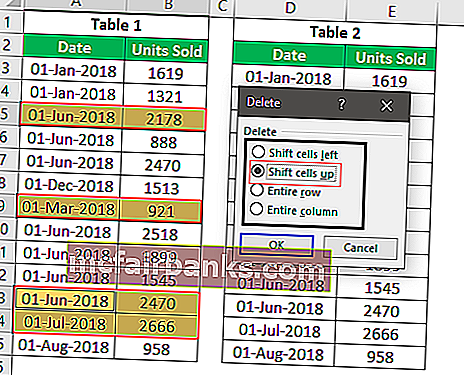
בחלון האפשרויות "מחק" יש לנו ארבע אפשרויות, אנו יכולים לבחור בפעולה בהתאם לדרישתנו. מכיוון שעלינו להזיז את התאים כלפי מעלה עבור אותם תאים שנמחקו, בחר "Shift Cell Up".
יהיו לנו שורות טבלה 2 ללא שינוי.

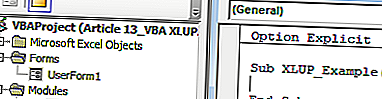
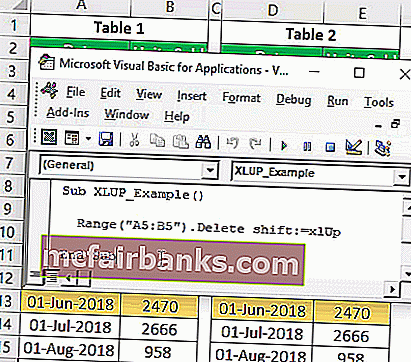
פעולה זו ב- VBA מחייבת שימוש במאפיין "XLUP" כדי לבצע קבוצת פעולות דומה ב- VBA. עכשיו בוא לחלון של עורך VBA והתחל את שם המאקרו שלך.
קוד:
תת XLUP_Example () סוף משנה
ראשית ספק את התא RANGE שייכלל בפעולה זו. בפעולה זו, התאים הראשונים שנמחקו ועולים למעלה הם תאי "A5: B5".
קוד:
תת XLUP_Example () טווח ("A5: B5") סוף משנה 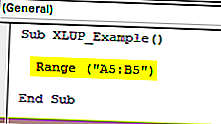
לטווח תאים זה בחר בשיטת "מחק".
קוד:
תת XLUP_Example () טווח ("A5: B5"). מחק משנה משנה 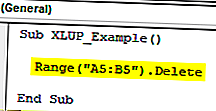
כפי שאתה יכול לראות בשיטת "מחק", יש לנו ארגומנט אופציונלי אחד כ- [Shift], עבור ארגומנט זה עלינו להזין את הארגומנט כ- "XLUP".
קוד:
תת XLUP_Example () טווח ("A5: B5"). מחק shift: = xlUp סוף משנה 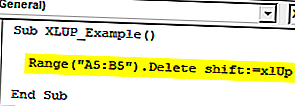
עכשיו אתה יכול להפעיל את הקוד הזה באופן ידני או באמצעות מקש קיצור המקשים F5, כדי לראות את התוצאה.
כפי שניתן לראות בטבלה 1, עברנו שורה מספר 6 לשורה החמישית ומצד שני הטבלה, שתי השורות (צבעוניות) אינה משתנה, ולכן באמצעות האפשרות "VBA XLUP" נוכל לבצע פעולה זו.
דוגמה מס '2 - מצא שורה משומשת אחרונה באמצעות XLUP
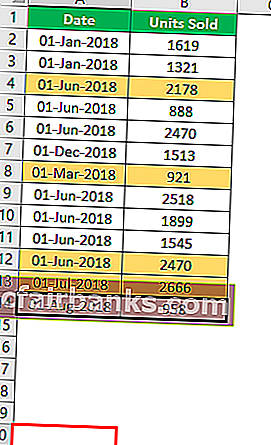
תאר לעצמך מצב שבו אתה נמצא בתא A20 (עיין בתמונה למטה) והתא האחרון בו אתה משתמש הוא A14.
עכשיו אם אתה רוצה לבחור את התא האחרון ששימש (A14). איך תעשה באמצעות מקש קיצור דרך ???
נשתמש במקש Ctrl + חץ למעלה כדי לעבור לתא האחרון ששימש מהמיקום הנוכחי.
מקש קיצור כדי לעבור לתא האחרון בו השתמשת


אז, מהתא הנוכחי, Ctrl + חץ למעלה בחר בתא האחרון ששימש. באופן דומה, בקידוד VBA אנו משתמשים ב- END (XLUP) כדי לבצע את אותו הדבר.
עכשיו חזור לחלון קידוד VBA.
In this window, we will perform the task of finding the last used row in the worksheet. Create a new subprocedure in the VBA window.
Code:
Sub XLUP_Example1() End Sub
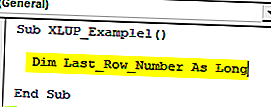
To store the last used row number. define the variable as the VBA LONG data type.
Code:
Sub XLUP_Example1() Dim Last_Row_Number As Long End Sub
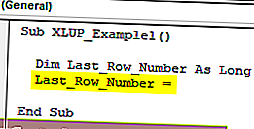
Now for this variable, we will assign the last used row number.
Code:
Sub XLUP_Example1() Dim Last_Row_Number As Long Last_Row_Number = End Sub
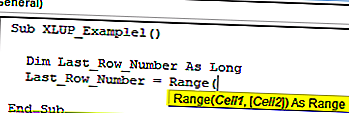
Now use RANGE object and open this object.
Code:
Sub XLUP_Example1() Dim Last_Row_Number As Long Last_Row_Number = Range( End Sub
Now mention the active cell (A20) for RANGE object.
Code:
Sub XLUP_Example1() Dim Last_Row_Number As Long Range("A14").Select Last_Row_Number = Range("A20") End Sub 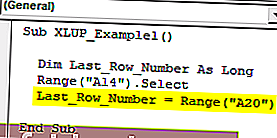
Now open END property for supplied range cell.
Code:
Sub XLUP_Example1() Dim Last_Row_Number As Long Range("A14").Select Last_Row_Number = Range("A20").End( End Sub 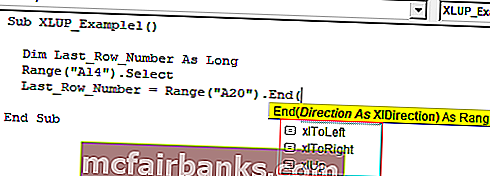
As you can see above, we have to arrow key options like “xlDown”, “xlToLeft”, “xlToRight”, “xlUp”. Since we are moving up from the A14 cell choose the “VBA XLUP” option.
Code:
Sub XLUP_Example1() Dim Last_Row_Number As Long Range("A14").Select Last_Row_Number = Range("A20").End(xlUp) End Sub 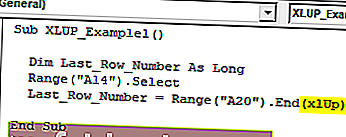
After moving up from A14 cell we need to mention what we need to do since we need the last used row number I will use ROW property.
Code:
Sub XLUP_Example1() Dim Last_Row_Number As Long Range("A14").Select Last_Row_Number = Range("A20").End(xlUp).Row End Sub 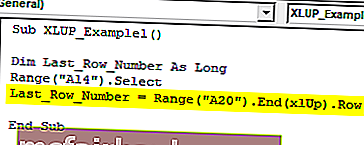
Now for the message box assign the value of variable “Last_Row_Number”.
Code:
Sub XLUP_Example1() Dim Last_Row_Number As Long Range("A14").Select Last_Row_Number = Range("A20").End(xlUp).Row MsgBox Last_Row_Number End Sub 
Now you can run this code manually or through shortcut key F5, to see the result.
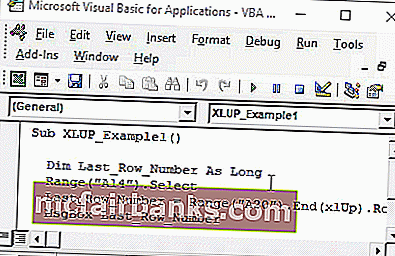
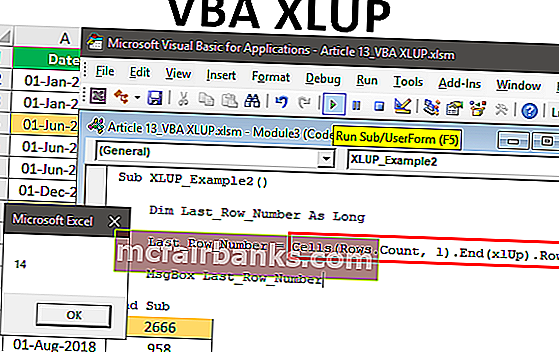
So message box showing the last used row number as 14, so our last data used row number is A14 cell.
In this case, since data is very small we started from A20 cell but when the data is large we cannot say which cell to take into consideration first, in such cases we need to employ a different technique.
We need to use CELLS property, below is the example of the same.
Code:
Sub XLUP_Example2() Dim Last_Row_Number As Long Last_Row_Number = Cells(Rows.Count, 1).End(xlUp).Row MsgBox Last_Row_Number End Sub
Now you can run this code manually or through shortcut key F5, to see the result.
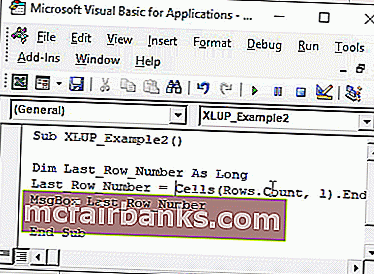
Instead of a RANGE object, I have used CELLS property. Let me explain this in detail to you.
ROW.COUNT this will count how many rows are there in column 1. What this will do is it will take into consideration of the last cell in the worksheet instead of random cell address, in the above case we have used A14 as the random cell address.
Things to Remember about VBA XLUP
- XLUP is the word used in VBA code to replicate the action of the “Up Arrow” key in excel.
- VBA XLUP is used to move from active cells to the above cell or last used cell.
- XLUP is generally used along with END property in VBA.